
Turn on and connect to your Minirig 4 (See Minirig 4 How To Guide).
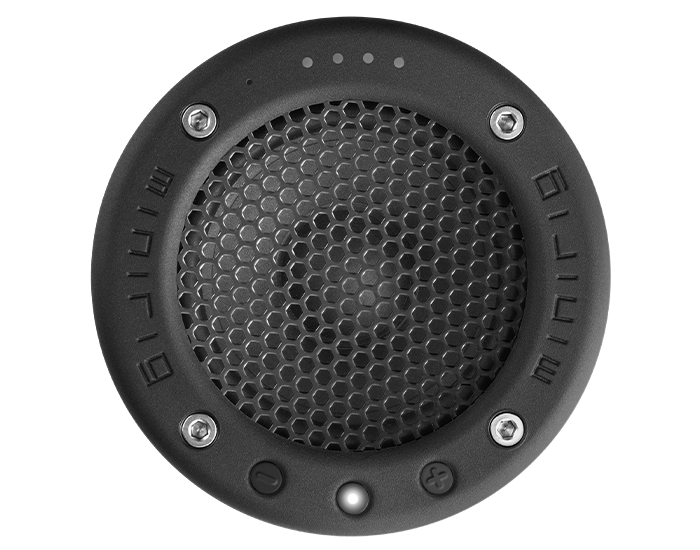
Tap (quick press) the middle power button to turn on the Subwoofer 4
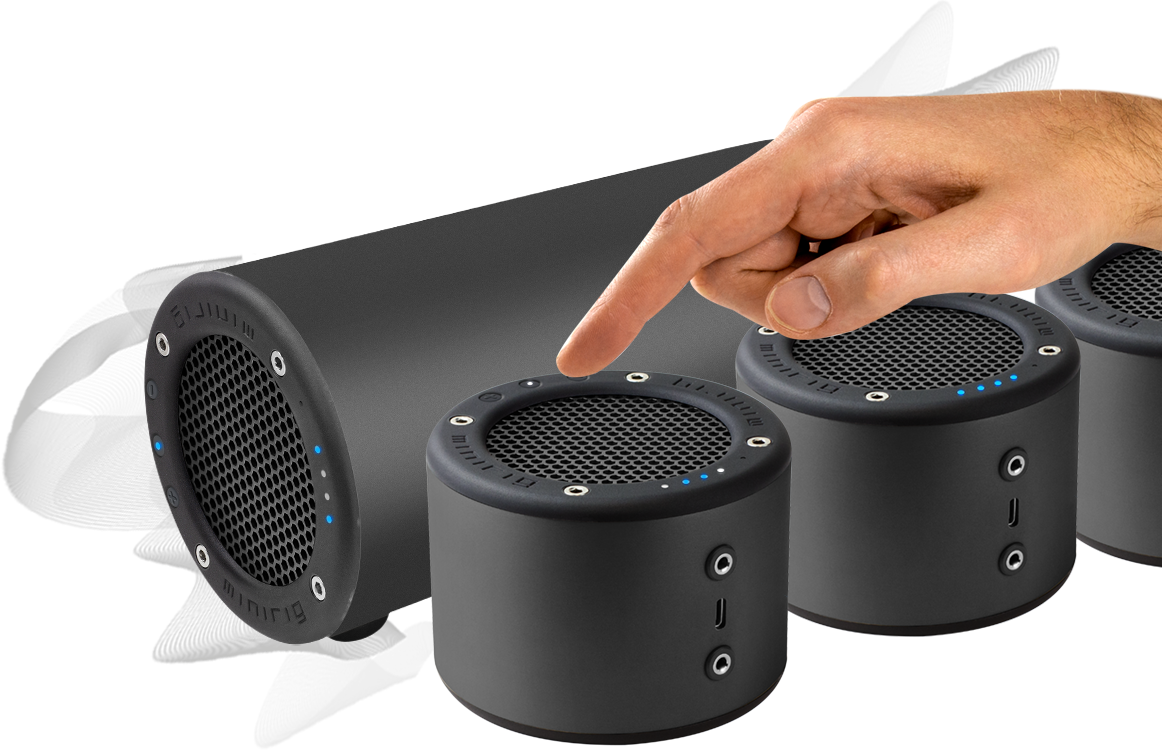
If you have TWO speakers (ONE Minirig and ONE subwoofer), connect the speakers using the wireless stereo process
If you have MORE THAN TWO speakers (eg. TWO Minirig 4 and ONE subwoofer 4), connect the speakers using the link-up mode process
To turn the Subwoofers 4 off, tap (quick press) the power button
Tap (quick press) the middle power button to turn on the Subwoofer 4
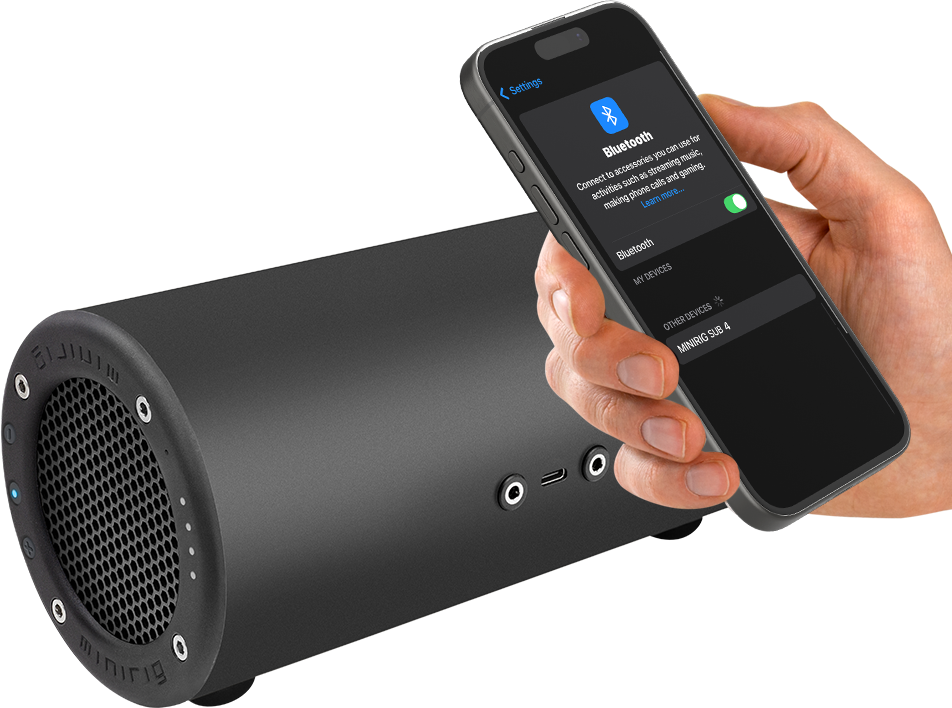
To enter Bluetooth pairing mode, press and hold the middle power button for 2 seconds
Open Bluetooth settings on your phone and “add device” or “pair new device”
Select “MINIRIG SUB 4” and once connected, start playing music
To turn the Subwoofer 4 off, tap (quick press) the power button
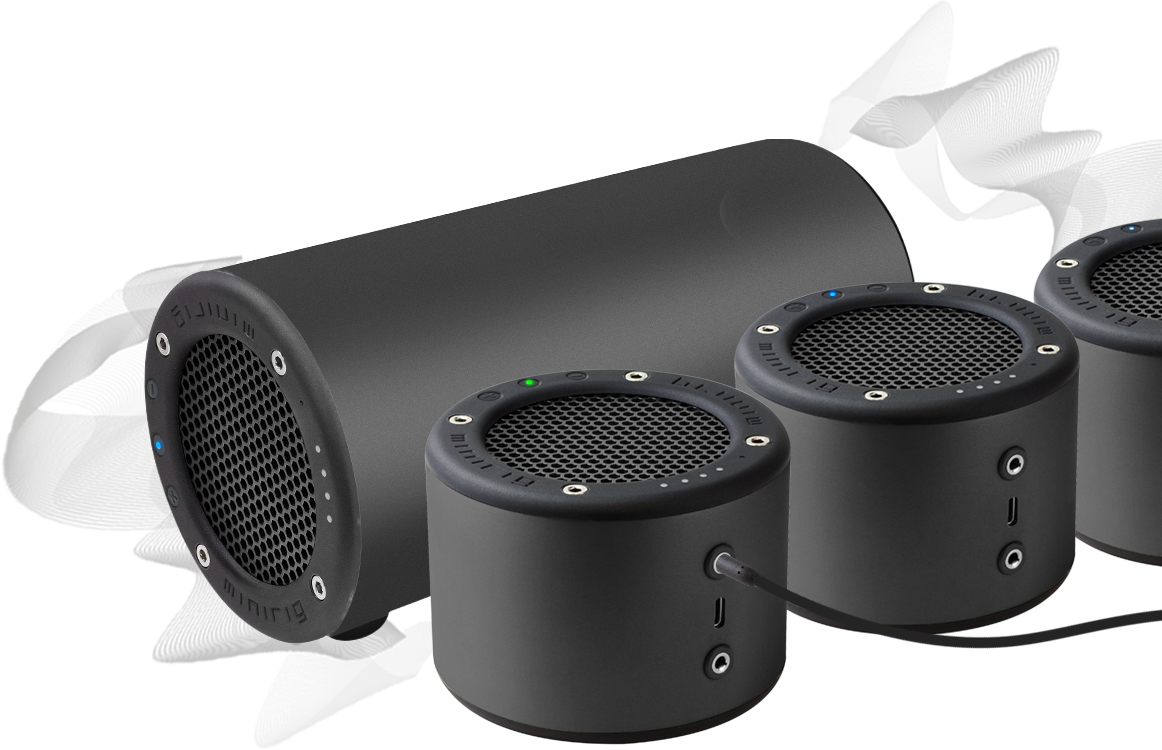
You will need to use the Subwoofer together with a Minirig - see various options below
Use the volume controls on your phone or music player to change volume via Bluetooth
You can also press the ‘+’ and ‘-’ buttons on the Subwoofer 4 to change volume
You can also change the volume using the Minirig app
The 4 LEDs will light up to show the volume level

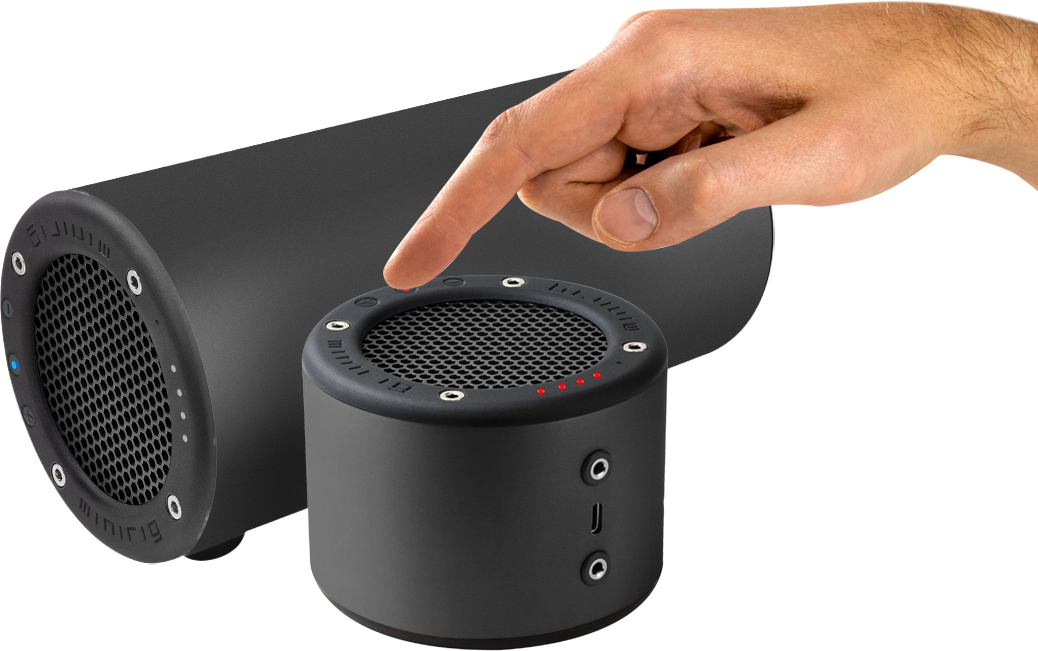
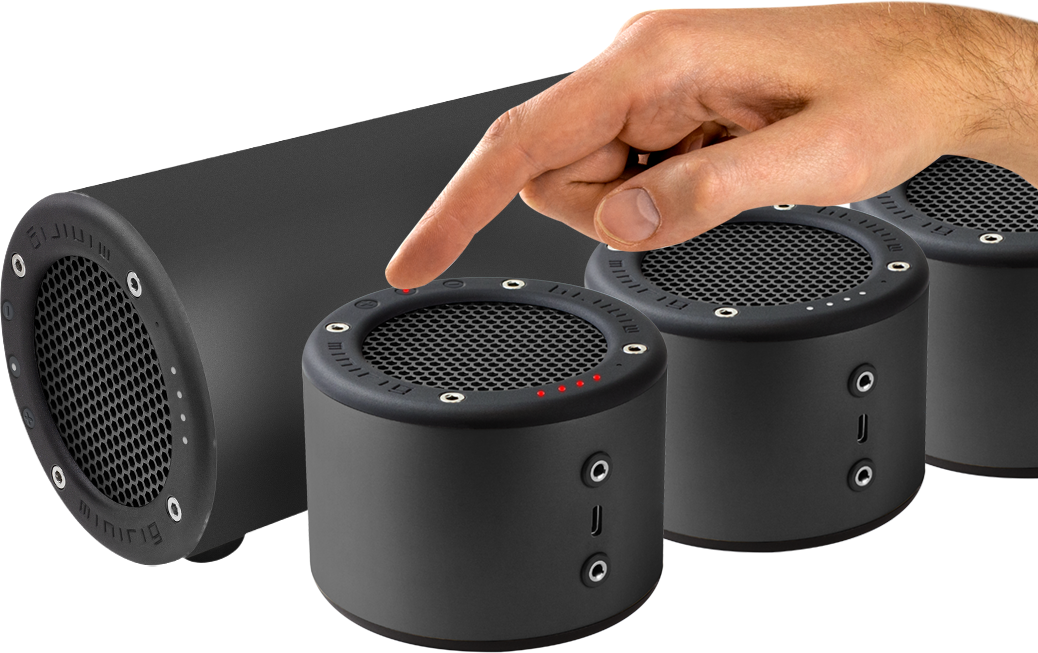
When the Subwoofer 4 is on, you can check the battery level by shaking it
The 4 LEDs will fade in and show the battery level as follows:
0 (red) = LOW (charging required)
0 = 10-25%
00 = 25-50%
000 = 50-75%
0000 = 75-100%
If the battery level is too low to turn on, the first LED will flash red
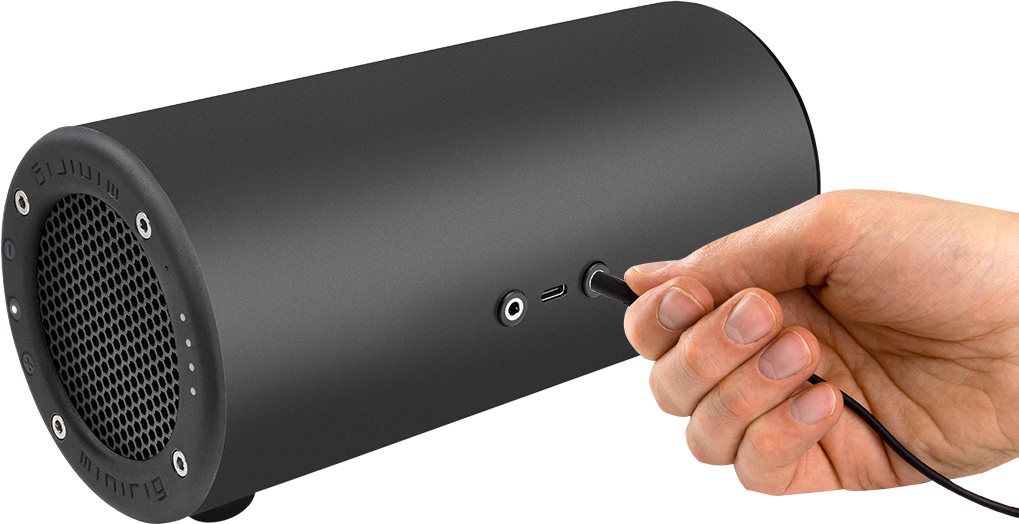
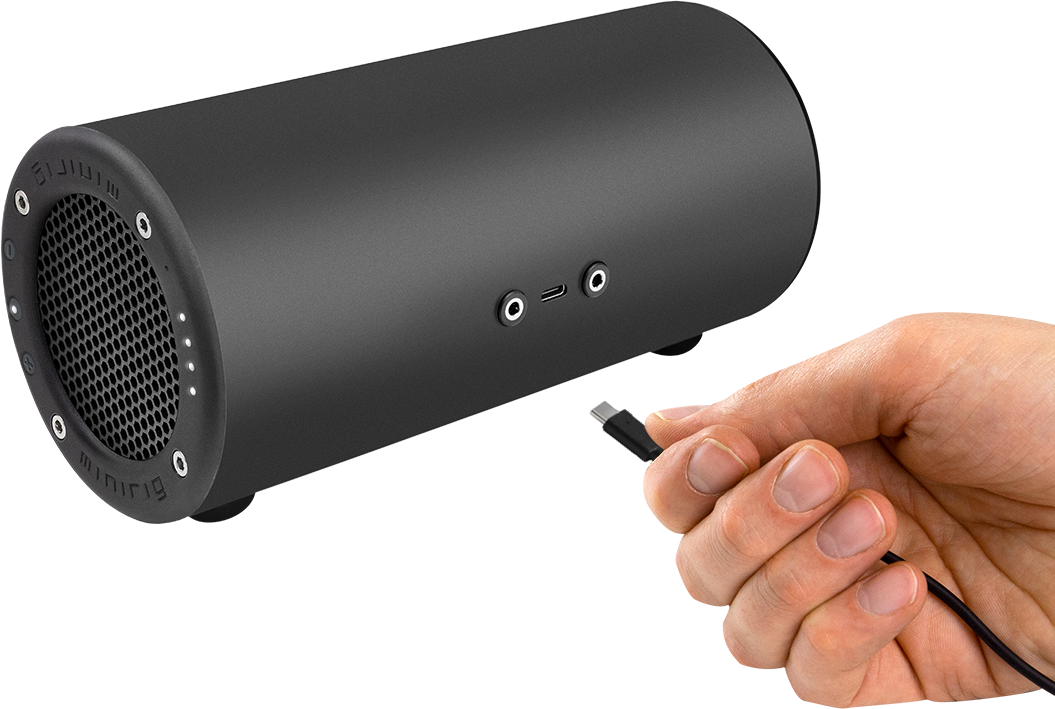
To charge the Subwoofer 4, plug the USB-C end of the included cable into the USB-C socket on the Subwoofer and the other end into a powered USB port
The 4 LEDs will ramp up in brightness to show charging. This will stop when charging is complete
For faster charging, use a USB-C "PD" port capable of 18W or more. A USB-C to USB-C cable will be required (not included)

Press the power button to turn on the Subwoofer 4
Plug an aux cable into your music source
Insert the other end of the aux cable into the FRONT socket of the Subwoofer 4 (nearest the grill)
The power button LED will turn green
Use the volume buttons on the Subwoofer 4 to change the volume
For the best sound, turn up the volume of your source and turn down the volume on the Subwoofer 4
Press the middle power button to turn on the Subwoofer 4
Connect and start playing music via Bluetooth
Insert an aux cable into the REAR socket of the Subwoofer 4 (nearest the port)
Plug the other end into the other device - i.e Minirig Subwoofer or Minirig
Use the volume control on your phone and the Subwoofer 4 to vary the volume
Press volume ‘+’ and volume ‘-’ together to change the balance. The aux output will always be the opposite - for example, if you set the subwoofer to LEFT the output will be RIGHT.
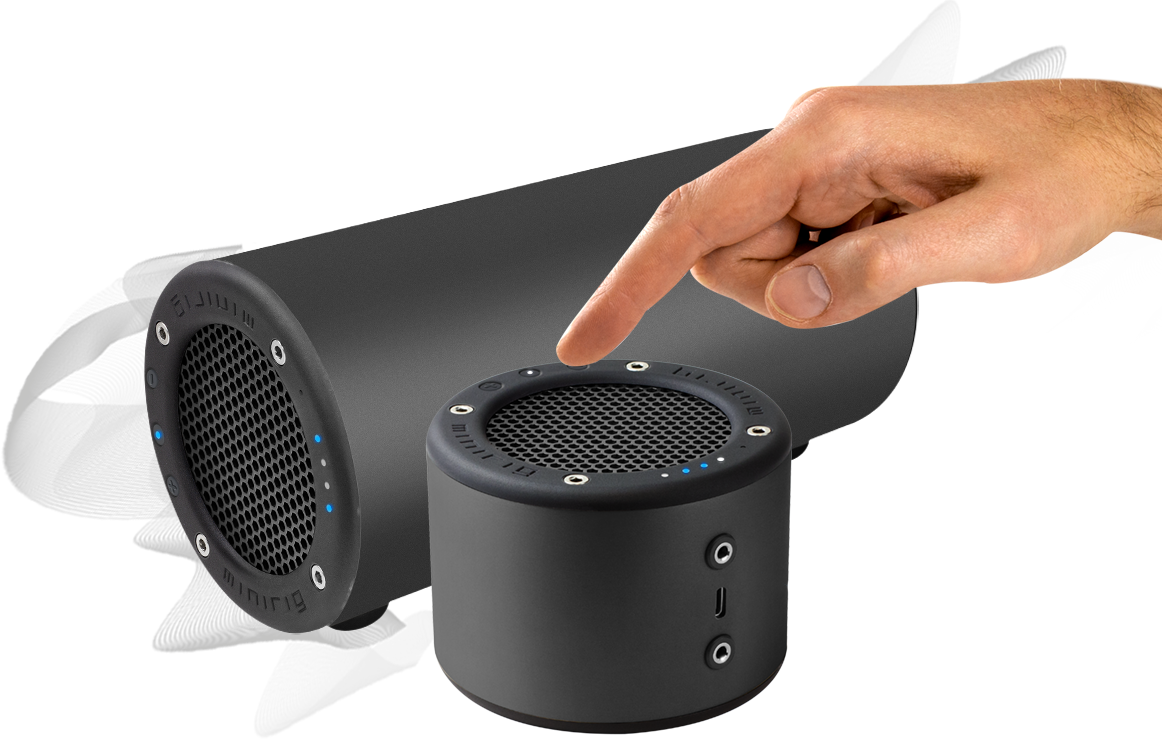
Start by turning the Minirig 4 and the Subwoofer 4 on, connect and play music through ONE of them
Press and hold volume ‘+’ on the speaker NOT playing music
Press and hold volume ‘+’ on the speaker playing music
You will see the 4 LEDs flash in a blue pattern
After a few seconds, they will pair and play together.
Use the volume button on the Minirig 4 or your device to change overall volume. Use the volume on the subwoofer 4 to change the subwoofer level (see below)
Wireless Mono uses the same high quality, precision corrected connection as Wireless Stereo. Both speakers play a combined left and right signal, delivering excellent stability, great sound quality, and reliable speaker to speaker range.
This connection type is limited to two speakers only (1x Minirig 4 and 1x Subwoofer 4 OR 2x Minirig 4)
Start by turning all the speakers on and playing music through ONE of them
Press and hold volume ‘-’ on all the speakers NOT playing music
Press and hold volume ‘-’ on the speaker playing music (source).
You will see the 4 LEDs flash in a blue pattern
After a few seconds, they will pair. You may need to start the music playing again.
Once the source Minirig 4/Subwoofer 4 has finished flashing, you can control the volume of all the speakers using your phone. Or, individually by using the volume buttons. Changing the volume on the subwoofer 4 will change the subwoofer level (see below)
Short-press volume ‘-’ and volume ‘+’ buttons at the same time to toggle balance between left/right/mono (see "balance"). For 2.1 and 2.2 setups, configure one Minirig 4 as LEFT and the other Minirig 4 as RIGHT
To add more speakers, press and hold volume ‘-’ on the new speakers NOT playing music, then go to step 3.
To disconnect a speaker, press and hold volume '+' button, or turn it off.
Linkup mode is designed for synchronised playback across multiple speakers positioned close together. It enables flexible, high speaker count setups, with performance prioritised for close range use. For maximum range and connection stability, Wireless Stereo or Mono mode is recommended.
Start with your Minirig and Subwoofer connected in wireless stereo
Press the power button on the speaker that is connected to your phone (white power LED) to turn it off
The other speaker will also turn off
When you want to use them again, turn them both on within 5 seconds of each other
They will automatically reconnect to each other and your phone
You can disable this feature using the app
Start with your Minirigs connected in link-up mode and Minirig 4s configured in left/right as desired.
Turn off the speaker connected to your phone (white power LED). The other speakers will turn off automatically.
When you want to use them again, turn all the speakers on within 20 seconds of each other
They will automatically reconnect to each other and to your phone. They should also recall the previous left/right/mono balance settings automatically.
You can disable this feature using the app
Locate a USB-C to USB-C cable
Plug one end into the USB-C port of the Subwoofer 4 and plug the other end into the USB-C port of your device
Depending on the device, the Subwoofer will either take power from your device or provide power to your device
The 4 LEDs will ramp up or down to show the direction of power
To change the direction of power, unplug the USB-C cable, wait 3 seconds and then insert it again
Non-USB-C devices can be powered using a “USB-C OTG” adapter
When the Subwoofer 4 is on, short-press volume ‘+’ and volume ‘-’ at the same time.
The 4 LEDs will light up white and display the current balance setting.
0000 = LEFT
0000 = LEFT + RIGHT (MONO)
0000 = RIGHT
It may be easier to press and hold volume ‘+’, then quickly tap volume ‘-’ to toggle through the settings.
Do not press and hold both buttons for over 4 seconds, as this will trigger update mode.
With a subwoofer, balance does not matter as most tracks have mono-summed bass. So generally, you should leave the balance set to mono. However, this feature may be useful to create a stereo setup when using the AUX out feature. See “AUX OUTPUT” for more info.
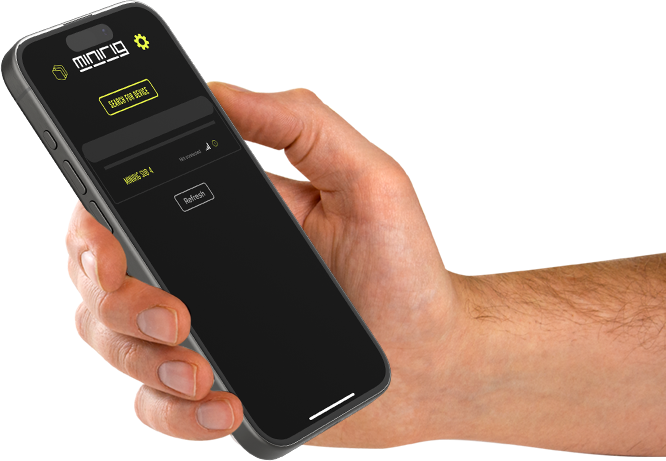
Download the app using the links below. Alternatively, you can access the app from any Chrome browser using the link: app.minirigs.co.uk
When the app opens, press “search for device”
When “MINIRIG SUB 4” appears, press it. If nothing appears, search again
Once connected, use the controls on the main page to change the sound
Use the settings page for further features and software updates
For info on how to use the app please follow this guide.
Please keep the app updated as new features will be added for the subwoofer 4.
Start by turning all the speakers on
Plug an aux cable into your music source (phone, TV, mixer etc)
Insert the other end of the aux cable into the TOP socket of one of the Minirig 4 speakers or the FRONT socket of the subwoofer, to put it into AUX IN mode. This is to be your central (transmitter) speaker.
Connect your speakers together using the wireless stereo or link-up process. The speaker in aux mode will be your central (transmit) speaker.
Once connected, the central transmit speaker will delay itself to match the other speakers. The sound delay (latency) is around 90ms in this mode.
You can configure the balance and volume of each linked speaker using the buttons

Turn on your Subwoofer 4 and connect to your device's Bluetooth. Now open the App
Select your Subwoofer 4 speaker from the list to connect to it
Press the settings logo in the top right corner
Scroll down the page to find “SOFTWARE VERSION”
Press the “check for updates” box
If there is an update available, press the update button
The Subwoofer 4 will reset into bootloader mode and display a YELLOW power LED
Search for devices using the app and select “MINIRIG SUBWOOFER 4 UPDATER”
Connect and read the page for a description of the update
Press the “PROGRAM” button
Wait for the update to complete - it will take 2-3 minutes. Do not leave the app and keep the phone close to your Subwoofer.
When the update is complete, the Subwoofer 4 will boot up - the 4 LED bar will display a YELLOW loading cycle
After around 10 seconds the Subwoofer will turn off
It is now ready to turn on and use again. You will need to pair your devices to the Subwoofer 4 again
The subwoofer can be turned up and down using the volume buttons to increase or decrease the bass level in the system
In wireless stereo, wireless mono and linkup modes, when the volume is changed on your device, this new volume level is routed to all connected speakers
To avoid any subwoofer bass adjustment being reset whenever the overall volume is changed from your device, we have implemented a subwoofer "level"
Turning the subwoofer up or down when connected in wireless stereo, mono and linkup mode will alter the subwoofer level. This level can be adjusted from -6 to +6 with a default of 0.
When the subwoofer level reaches min (-6) or max (+6), further volume presses in that direction will alter the volume only, not the level
When volume is changed from the source device (phone), the subwoofer level is applied as an offset - increasing or decreasing the volume level. In this way, any bass adjustment you make is not lost when the overall volume is changed
The subwoofer level can also be set using the app (pending update). The value can be read using the app by connecting directly to the subwoofer 4
The subwoofer level is reset to 0 when the subwoofer is powered on, unless "save EQ" setting is enabled